4th of July Pinwheel Craft Idea

Disclosure: This post may contain affiliate links, meaning if you decide to make a purchase through my links, we may earn a commission at no additional cost to you. Read about our affiliate policies here.
There are just so many fun things to do on Independence Day, and honestly, there’s no better way to spend the afternoon than to get engrossed in some cool paper crafts! And guess what- we have something to help you with just that!
Keep reading to discover step by step, a simple and easy pinwheel craft idea you wouldn’t want to miss working on with your toddler!
RELATED: USA Wood Craft Idea for Kids

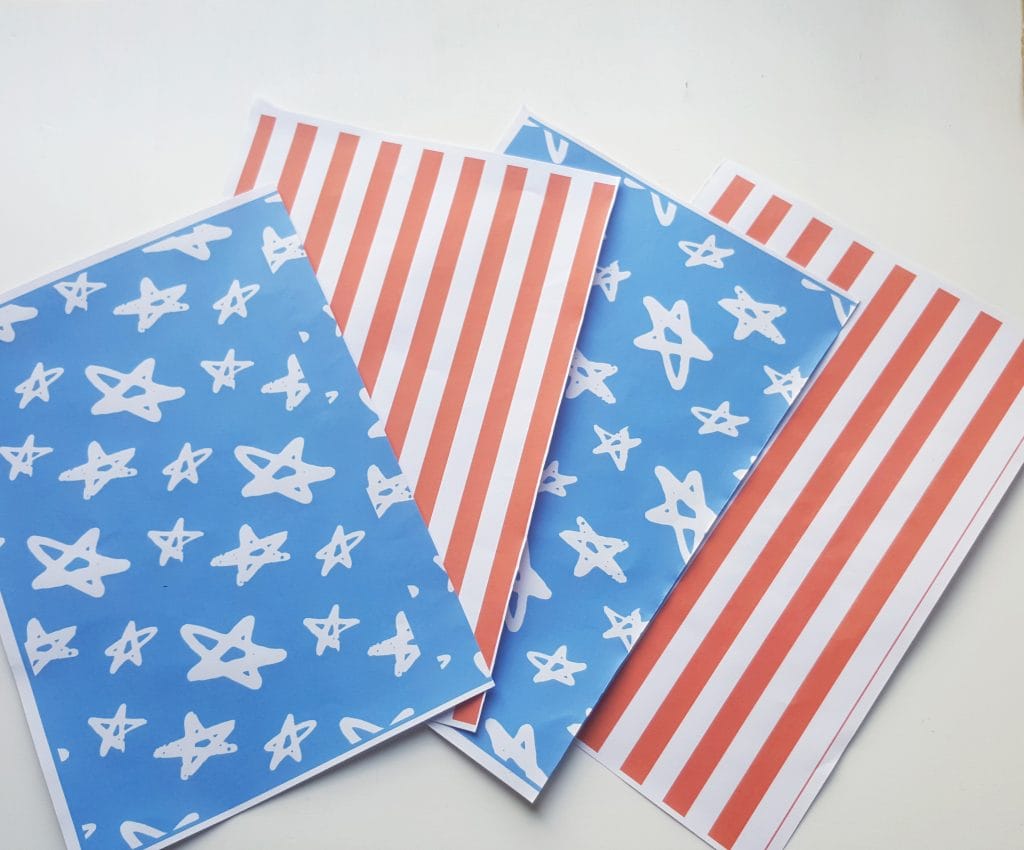
List of Supplies
If you already have printed papers (in blue and red), you’re pretty much sorted, since the supplies list for this pinwheel craft idea is no biggie! If you don’t have them, use our one-click downloads below and print them on either sides of a sheet of paper, or on different sheets and stick them together!

Download the template patterns here:
[convertkit form=975677]
Making Your 4th of July Pinwheel Craft
4th of July Pinwheel Craft Idea
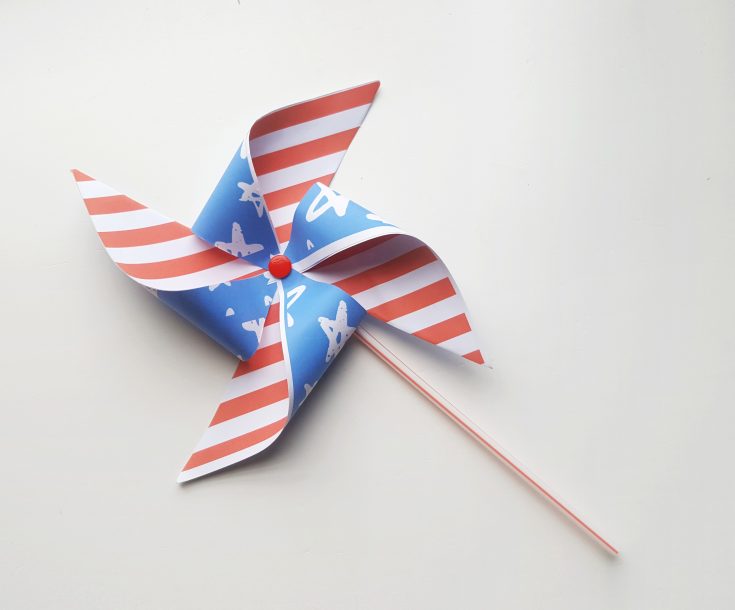
And now that you have your supplies all ready, it’s time to get started with this super easy 4th of July inspired pinwheel craft idea!
Materials
- A4 size regular paper
- Scissors
- Craft glue
- Thumb pin
- Drinking straw
Instructions
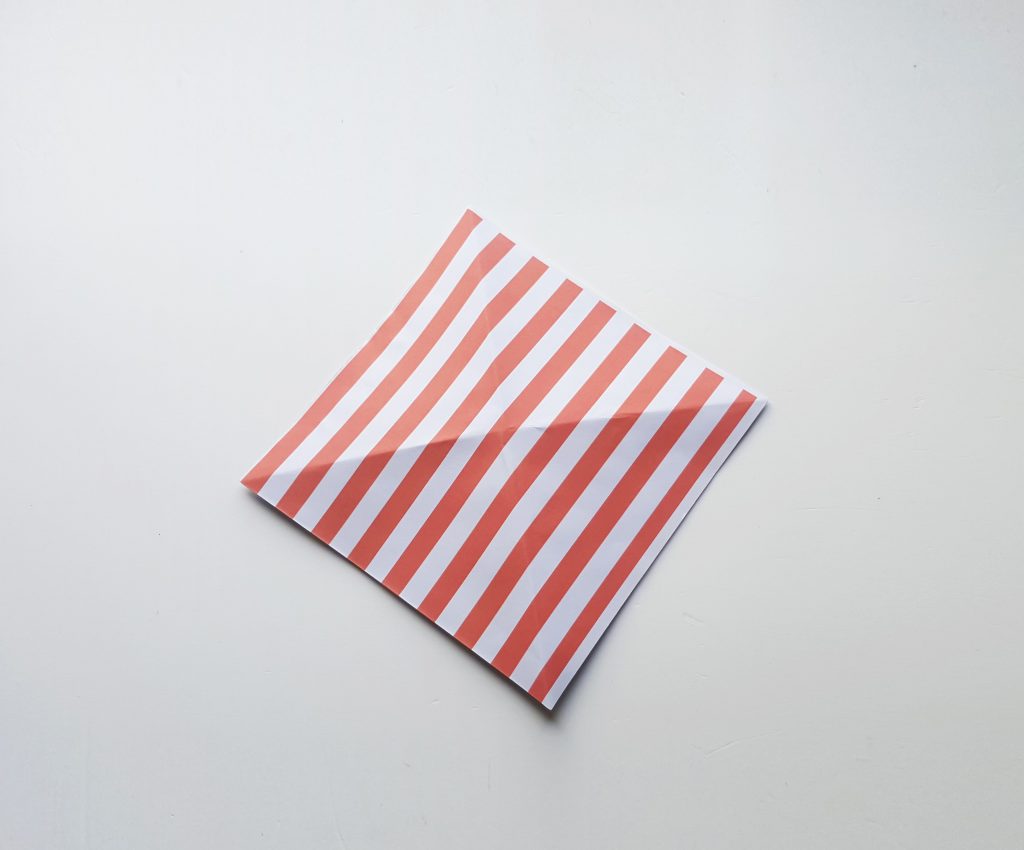
- Print out the provided template patterns. Print both sides of the same paper or attach 2 printed papers together on their blank sides. Prepare the printed papers into square.
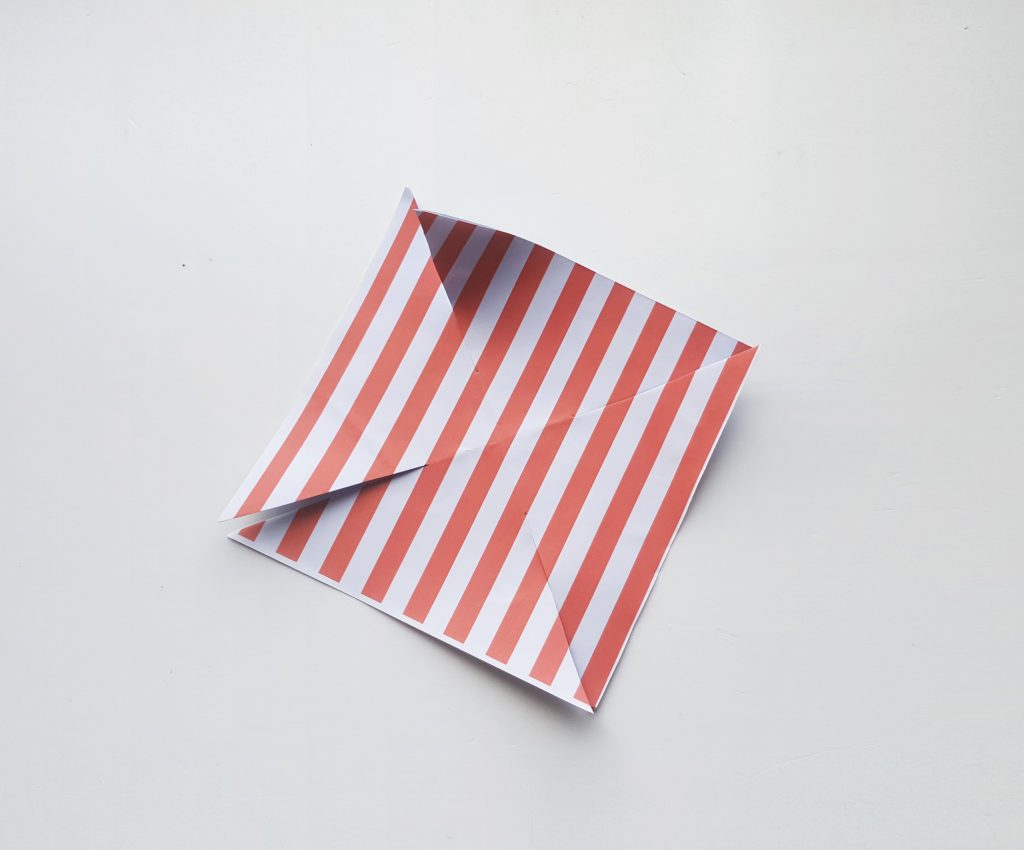
- Prepare the printed papers into square. Fold the square paper into half diagonally criss-cross wise to create crease lines.
- Cut slits along the crease lines. Cut the slits 1/3 of the way from the center.
- Each slit will have 2 open corner ends on both sides. Hold and bring any one of the open corner points towards the center and apply glue to secure its position on the center.
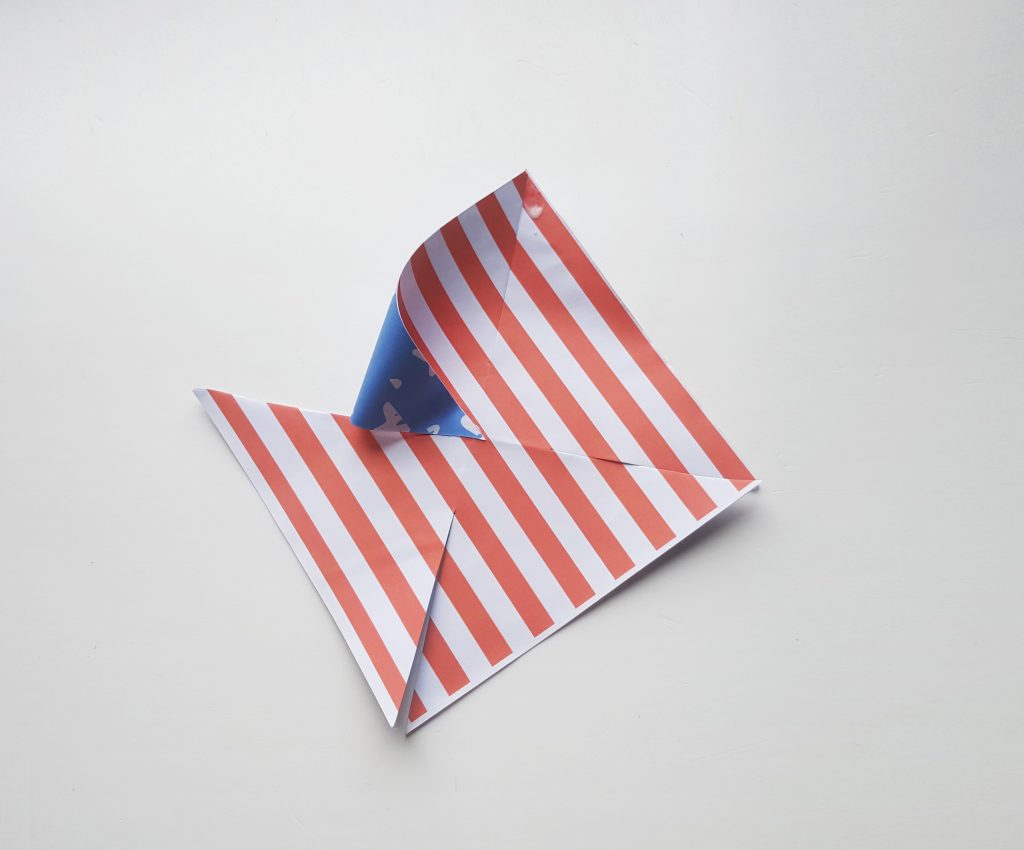
- Skip the open-end corner next to the center folded corner. Now, bring the next corner towards the center.
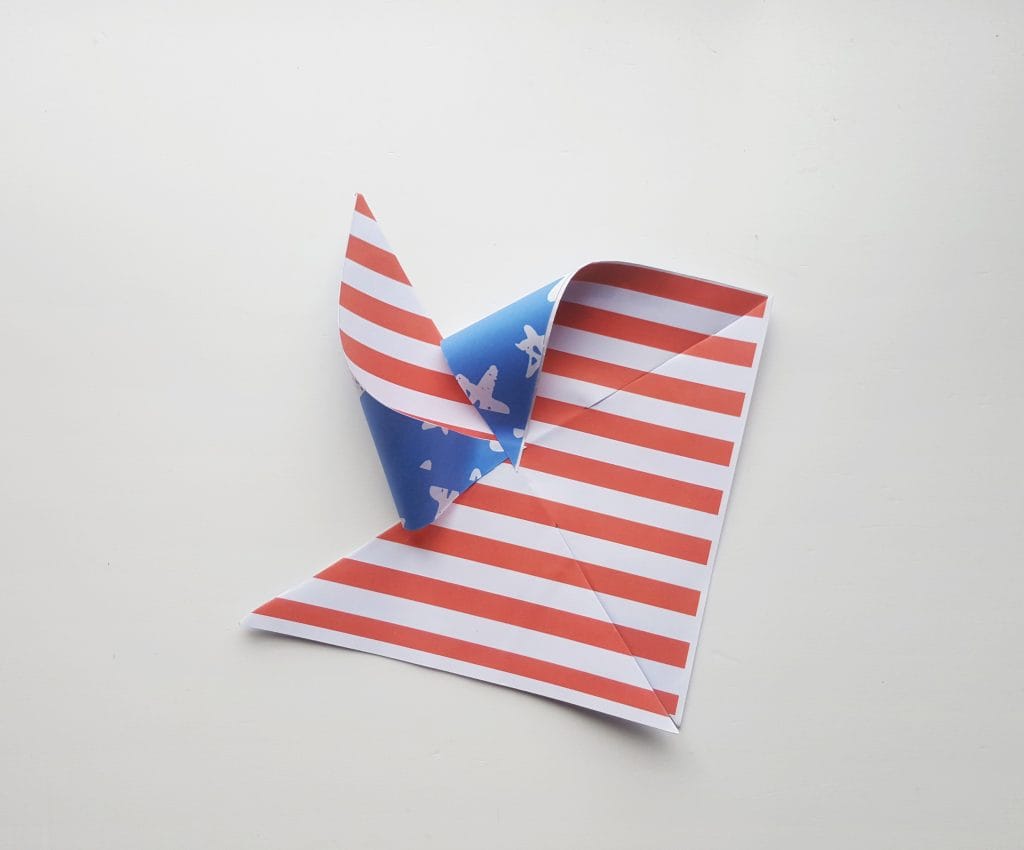
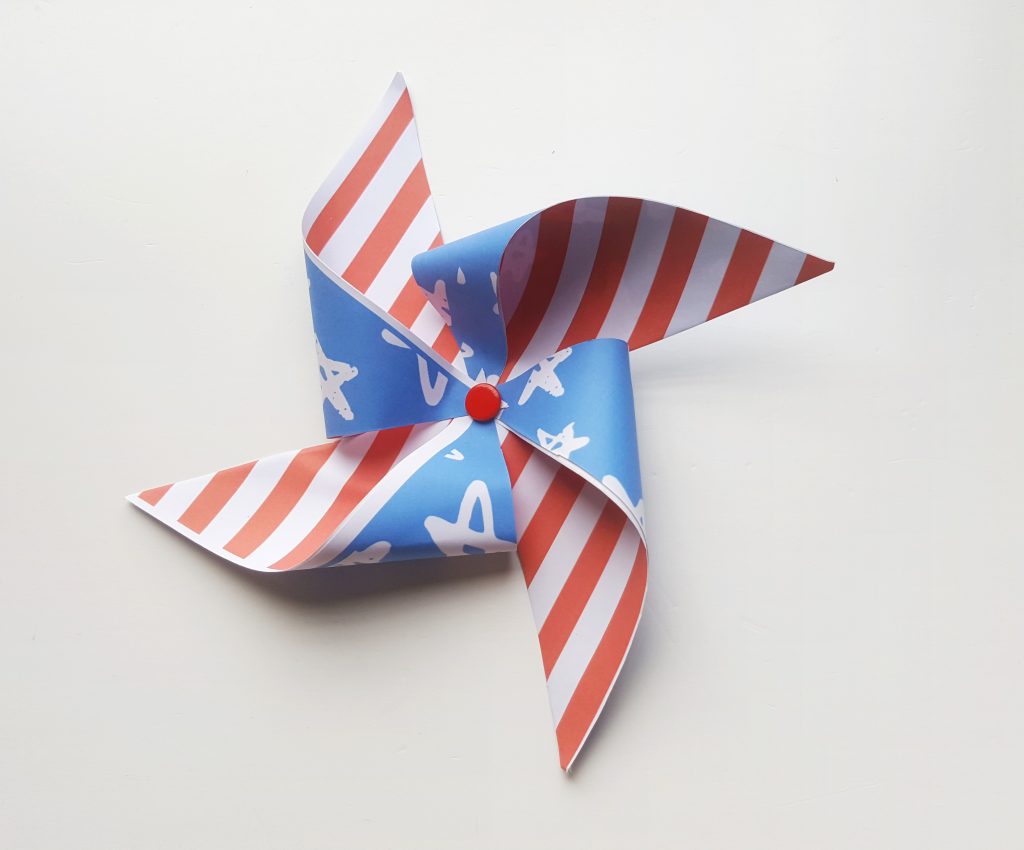
- Repeat process until all 4 open ends are drawn into the center. Apply glue to secure the paper pin wheel pattern.
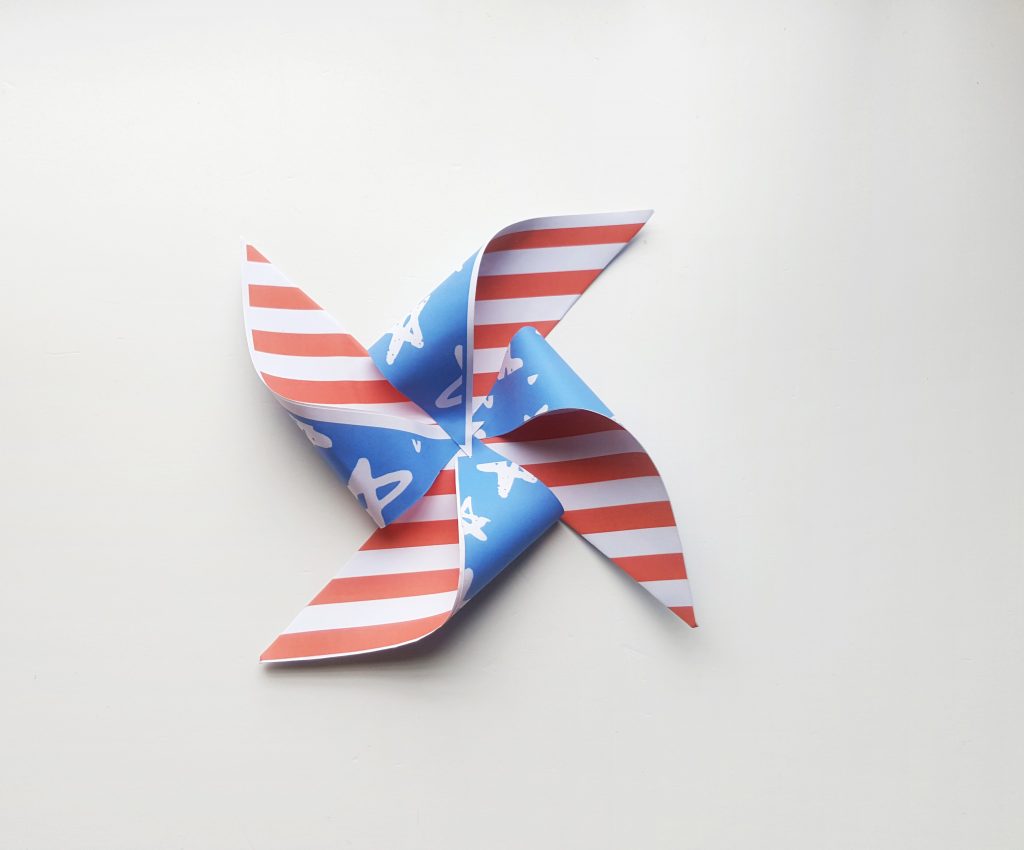
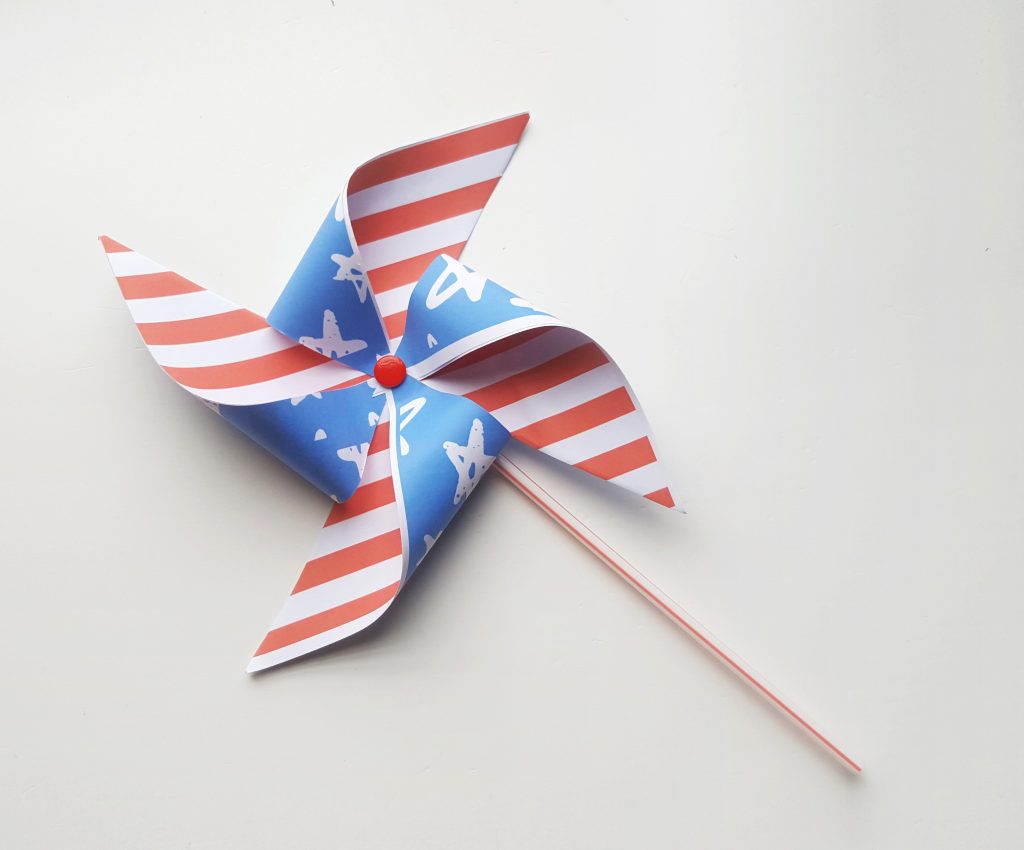
- Grab a drinking straw, a thumb pin and the paper pin wheel.
- Place the thumb pin into the center of the paper pin wheel.
- Place the drinking straw on the back side of the paper pin wheel, and carefully pressing it into the thumb pin on the back side. Apply a small piece of sticky tape to secure the pointy edge of the thumb pin on the back side. Done!
Step by Step Photos

Tried this pinwheel craft idea? How did it go? Let us know in the comments box below!
Also, follow us on social media to keep up with even more fresh content, puzzles, activities, and craft ideas for kids!

Join 10,000+ Subscribers
Join The Milestone Mom Newsletter
Get expert advice from a certified teacher and Pediatric Developmental Therapist directly in your inbox every week!